
Glazed Pearl Onions Recipe


Looking for a simple, tasty side dish that’s easy on the budget? This Glazed Pearl Onions Recipe is a great option! In just 25 minutes, simple frozen onions cook up into a sweet, caramelized dish that pairs nicely with everything from roast chicken to holiday ham.
Pearl onions might seem fancy, but they’re one of the most affordable vegetables you can keep on hand. Stock up when they’re on sale and stash them in the freezer for nights when you need a quick and easy side!

One of the best things about this recipe is that it practically cooks itself! Once you get those onions browning in the skillet, add a few more ingredients and let time do the rest. The natural sugars in the onions caramelize with the added sugar and thyme to create a glossy, flavorful glaze.
Whether you’re cooking a weeknight dinner or prepping for a holiday dinner, this easy pearl onion dish adds a cozy, flavorful touch to the table—and it goes well with just about anything!
Why You’ll Love the Glazed Pearl Onions Recipe
Glazed Pearl Onions are a great addition to any meal, and there are plenty of reasons to love them. Here are just a few:
- Super Simple — With just five ingredients and one skillet, you’ll have this side ready in no time. No complicated techniques or fancy equipment needed.
- Budget-Friendly — Frozen pearl onions are much cheaper than fresh ones and work just as well. You can make this whole dish for under $3 and still have enough to serve five people.
- Naturally Sweet — Kids love these because they taste almost like candy! The longer cooking time brings out the natural sweetness of the onions.
- Holiday Perfect — These caramelized pearl onions pair beautifully with turkey, ham, beef, or chicken and look great on the table without adding extra work to your prep.
You can also customize this recipe in many ways! Try adding a splash of balsamic vinegar for extra depth, or toss in some crispy bacon bits for a savory twist. Some people love adding a pinch of red pepper flakes for a tiny kick of heat.
Ingredients for Easy Pearl Onions Side Dish
This recipe keeps things simple with a handful of ingredients that come together to build rich, caramelized flavor in every bite.
- Olive Oil — Creates the perfect base for browning and prevents sticking in your cast-iron skillet
- Frozen Pearl Onions — The star of the show! Much more convenient than peeling fresh ones and just as delicious
- Sugar — Helps speed up the caramelization process and adds that beautiful golden glaze
- Salt and Pepper — Essential seasonings that bring out the natural onion flavors
- Fresh Thyme — Adds an earthy, aromatic note that makes these onions taste gourmet
- Water — Creates steam to help tender the onions while they cook
You likely already have most of these ingredients at home. Fresh thyme adds a nice flavor boost, but dried thyme works just as well if that’s what you have.
A printable recipe card is available below, complete with exact measurements, to make your cooking even easier!
This post contains affiliate links, which means I earn a commission when anything is bought. This is at no additional cost to you.
🍳 My New Favorite — With a Reader Discount!
This is my new favorite nonstick skillet I use every single week — and I’ve got a deal just for you!

🛍️ Elite 5.5-Quart Oval Electric Skillet
- ✔️ Non-toxic & PFAS-free
- ✔️ Easy to clean (even after cheesy eggs!)
- ✔️ Beautiful enough to serve in
🌿 $25 off a $150+ purchase with code: 3BOYSANDADOG
🟢 “400+ readers clicked this code last month – I truly love this pan!”
Instructions to Make Sweet Glazed Pearl Onions
Achieving perfect results with this recipe requires patience during the browning stage. Don’t rush this step, as it’s where all the flavor develops.
Step 1: Heat and Brown
Warm the olive oil in a cast-iron skillet over medium heat. Add the thawed and dried pearl onions in a single layer. Let them sit undisturbed for about 3-4 minutes before stirring. This gives them time to develop that gorgeous golden color on one side.
Continue cooking and stirring occasionally until they’re nicely browned all over, which takes approximately 5 minutes in total.
Step 2: Add the Good Stuff
Sprinkle in the sugar, salt, pepper, and thyme, then add the water. Give everything a gentle stir to combine. The water will create some steam and help dissolve the sugar into a glaze.
Step 3: Cook and Reduce
Let the mixture simmer away for 15-20 minutes. You’ll see the liquid gradually reduce into a shiny glaze that coats each onion. Stir occasionally, but not too often. You want that glaze to concentrate and thicken.
The onions are done when they’re fork-tender and coated in a glossy, golden glaze. If there’s still too much liquid, cook for a few more minutes until it reduces to your desired consistency.

Side Dish Tips and Tricks
Want to take these glazed pearl onions to the next level? Here are some professional tips that will make all the difference!
- Pat those frozen onions completely dry before cooking. Excess moisture prevents proper browning.
- Don’t overcrowd your skillet. Cook in batches if needed for better caramelization.
- Medium heat is key. Too high and the sugar will burn before the onions cook through.
Troubleshooting Pearl Onions with Thyme
Running into any issues? Don’t worry, these common problems have easy fixes!
- If your glaze gets too thick, add a tablespoon of water and stir gently.
- Onions not browning? Increase the heat slightly and make sure they’re completely dry.
- Too salty? Add a pinch more sugar to balance the flavors.
Recommended Resources
Having the right tools makes this recipe even easier to master! Here are my top picks for preparing and serving these delicious glazed onions:
Would you like to save this?
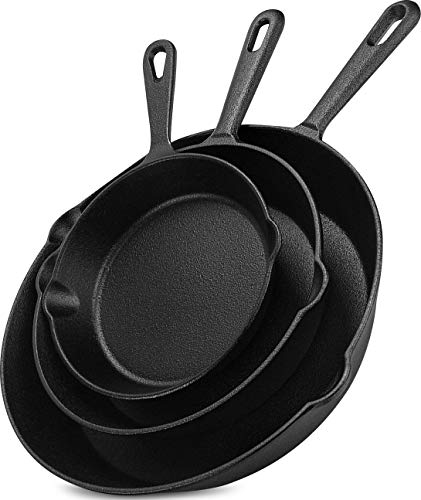
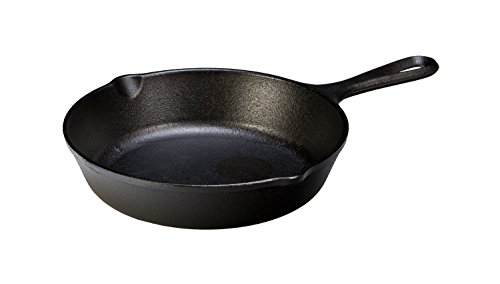
- A quality cast-iron skillet (distributes heat evenly for perfect caramelization every time)
- Glass mixing bowls (perfect for organizing your ingredients before cooking)
- A complete baking utensils set (ensures you have everything needed for stirring and serving)

Customizing this Side Dish Recipe for Every Diet
This naturally gluten-free recipe adapts beautifully to different dietary needs and preferences!
- Vegan Version — Substitute the olive oil with your preferred plant-based oil, and you’re all set. The recipe is already dairy-free and egg-free.
- Lower Sugar — Reduce the sugar by half and let the natural onion sweetness shine through. The caramelization will take a bit longer, but the results are still delicious.
- Herb Variations — Try rosemary instead of thyme for a more piney flavor, or use sage for a more autumn-inspired taste. Fresh herbs always work better than dried when possible.
- Add Some Heat — A pinch of red pepper flakes or a dash of hot sauce can transform these into spicy glazed onions for those who like a kick.

Making a Meal Out of Caramelized Pearl Onions
These versatile onions work beautifully as part of a larger spread or even as a base for heartier dishes.
- Holiday Feast Pairing — Serve alongside roasted turkey, loaded mashed potatoes, and green bean casserole for a complete Thanksgiving dinner. The sweet onions balance perfectly with savory gravies and stuffing.
- Weeknight Dinner Ideas — Pair with grilled chicken thighs, roasted Brussels sprouts, and crusty dinner rolls. The 25-minute cooking time fits perfectly into busy evening schedules.
- Breakfast Integration — Leftover glazed onions are amazing, stirred into scrambled eggs or served alongside breakfast sausages for a sweet and savory morning meal.
- Grain Bowl Addition — Toss these over quinoa or coconut rice with roasted vegetables and grilled protein for a nutritious, yet fancy, bowl meal.
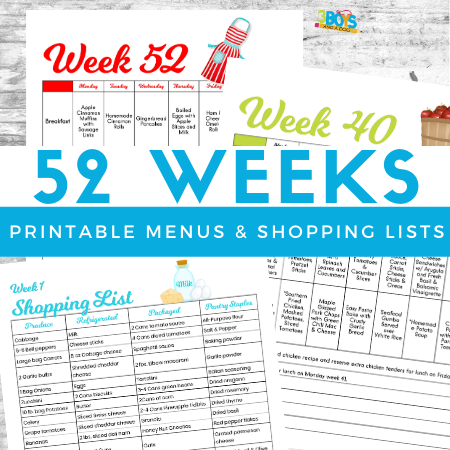
Shop My Printables
These printables are great for meal planning and organizing! Simply click the image to check out my shop products!


Recipes with Pearl Onions
Once you discover how easy pearl onions are to work with, you’ll want to use them in everything! Here are some other delicious ways to enjoy them:
- French Onion Mushroom Casserole — Bake pearl onions with mushrooms, herbs, and a rich, savory sauce for a cozy, French-inspired side dish that pairs beautifully with roasted meats.
- Creamy Pearl Onion Gratin — Layer them in a baking dish with cream and cheese for an indulgent holiday side.
- Pearl Onion Beef Stew — Add them to your favorite stew recipe during the last 30 minutes of cooking for an extra sweet and rich texture.

FAQs about Glazed Pearl Onions Recipe
Glazed Pearl Onions Recipe Storage and Reheating Tips
Store leftover onions in an airtight container in the refrigerator for up to 4 days. The flavors develop and improve overnight, making them taste even better the next day!
To reheat, warm them gently in a skillet over low heat with a tablespoon of water. Stir occasionally until the mixture is heated through and the glaze becomes shiny again. Avoid the microwave if possible. It can make the onions mushy, and the glaze can separate.
Get creative with leftovers! Chop them up and add to omelets, toss with pasta and Parmesan cheese, or use them as a pizza topping. They also make an excellent addition to grain salads or bowls.

Glazed Pearl Onions
Equipment
Ingredients
- 2 teaspoons olive oil
- 1 pound frozen pearl onions thawed and patted dry
- 2 teaspoons sugar
- Coarse salt and ground pepper
- 1 ½ teaspoons fresh thyme or 1/4 teaspoon dried
- ⅔ Cup(s) water
Instructions
- In a skillet over medium heat, heat the oil. Add onions and cook until browned, at least 5 minutes. The longer they cook, the sweeter they become.
Add remaining ingredients and cook until tender and liquid has evaporated, about 15-20 minutes.
Nutrition
More Recipes Like Sweet Glazed Pearl Onions
If you enjoyed this easy onion recipe, here are a few other quick veggie sides that are just as simple and tasty:
- Honey Glazed Carrots — Another sweet and savory side that uses similar techniques and cooking times.
- Caramelized Brussels Sprouts — Perfect for those who want to try caramelizing other vegetables using the same method.
- Maple Roasted Butternut Squash — Sweet, seasonal, and pairs beautifully with these glazed onions for holiday meals.

Simple dishes like these are often the most satisfying! The combination of sweet caramelization and fresh herbs creates something special enough for holidays but easy enough for any night of the week.
Tried the recipe? I’d love to hear how it went! Let me know what you served with the onions or how you made it your own. And don’t forget to save this one—it’s a side dish worth repeating!


